Healthy Kitchen Smells Fresh

August 20, 2010

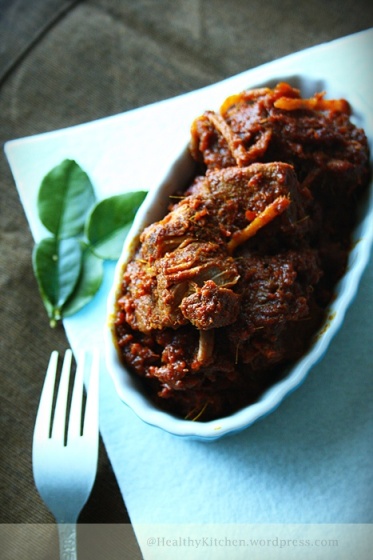
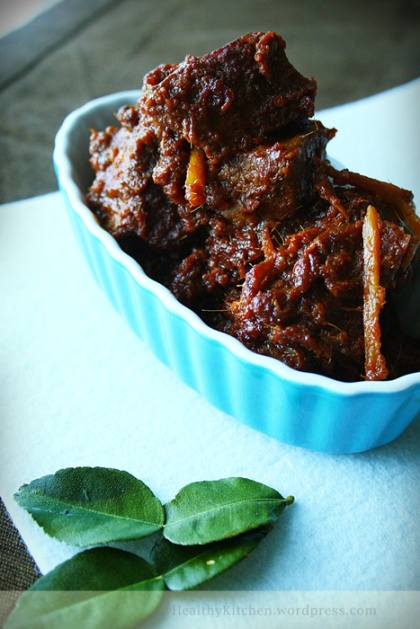
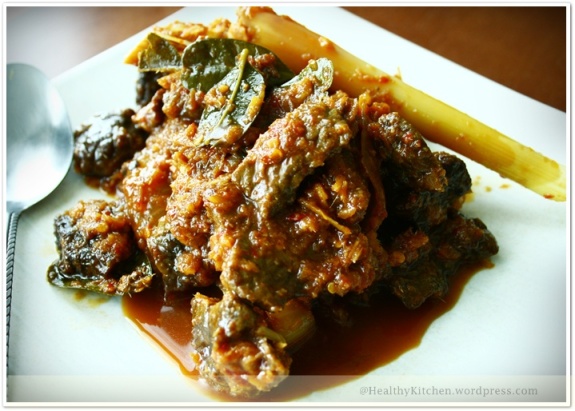
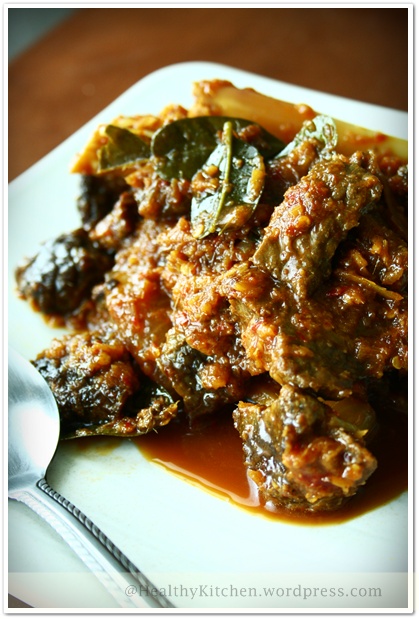
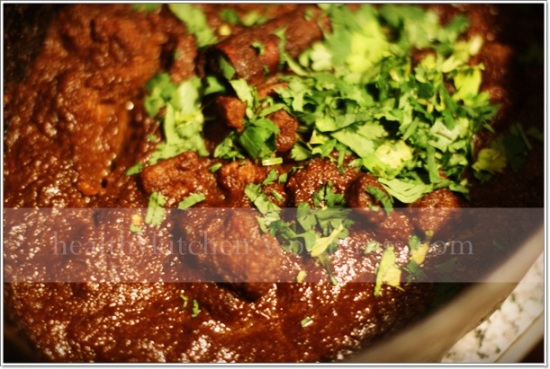
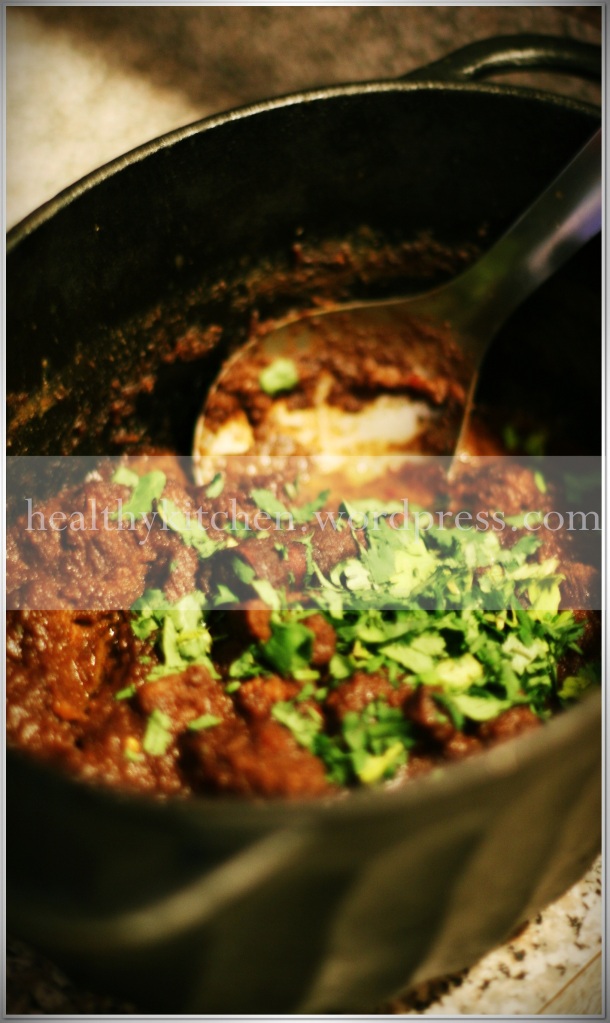
Beef Kerutuk

Filed under: Allergy Free, Asians, Cooking, Gluten-Free, Malaysians, Side Dishes — nshahida @ 11:51 pm

Beef  Kerutuk ( serves 3-5 hungry people)

My little headnotesif you are running out of time and want to make this dish quick as possible, slice the beef  ½ inch thick. And in the cooking method, please skip method #5 and 6. proceed to method #7. Because when the beef is sliced a bit thinner, it won’t take long to tender. I just love the chunk one because I think it’s more flavorful and succulent.

As for kerisik, this is a bit of challenge because you have to make it yourself ( see my kerisik recipe). If you are in M’sia or easy access of kerisik , usually available in groc in M’sia.. then get a bulk or two. If otherwise and you don’t have time to make one.. ( I usually make kerisik ahead of time , store  in a container and refrigerate and ready whenever I need it )  just toast the grated coconut till slightly dark brownish and ready to use for this dish. Or Just add an extra cup of coconut milk. Then you are good to go.

Ingredients:

  • 1lbs beef  chunk, washed and drain excess liquid. ( see Notes)
  • 2-3 Tbsp chili paste (depending on how much heat you like in your food)
  • 1 Can thick Coconut milk (approximately 350mL)
  • 2-3 Tbsp Java sugar ( recommended ) or dark brown sugar
  • 3 Tbsp medium sweet soy sauce
  • 2 Tbsp coconut paste , Kerisik ( see Notes)
  • 3 small Asam Gelugur ( optional)

Spices and other ingredients:

  • 1 stick cinnamon
  • 3 cardamom pods
  • 3 star anise ( bunga lawang)
  • 3 cloves ( bunga cengkih)

Into a blender:

  • 1 medium size yellow onion, roughly chopped ( if you can find shallots , that would be great . 3 Shallots is called for or  1 medium purple onion)
  • 2 cloves garlic
  • 1 thumb size fresh ginger root
  • 3 Tbsp Korma spice
  • 1 Tbsp tumeric powder
  • 1 Tbsp freshly ground black pepper

– Blend these ingredients till smooth brownish paste is formed.

  • Salt , to taste
  • ¼ cup water ( if needed)
  • 2-3 Tbsp canola oil for sautéing .

Method:

1- Heat up a medium pot or cast iron on medium-high heat. Drizzle the oil and let it heated for sautéing .

2- Add in  cinnamon , cardamom , star anise and cloves. Sauté to fragrant.

3- Add the paste ( all ingredients that have been blended into a paste) , keep stirring and let it fragrant and the oil comes to the top. If it starts burning on the bottom, add some water and let it simmer.

4- Toss in the beef and Asam gelugur if using .

5- Add enough water to cover just right the top of the beef.. not too much water though. Cover the pot , reduce the heat to medium-low . This is to tenderize the meat slowly while absorbing the spices . it takes about 40 -60 minutes depending on how tough the meat is. ( See Notes)

6- When the meat becomes tender and the gravy has thicken, uncover the pot.

7-Add the coconut milk and continue to cook the meat and the coconut milk mixed well with the spices and come to thicken.

8- Add the salt, Java sugar, kerisik and soy sauce. Adjust the salt and sugar to your taste. Let it simmer about 8-15 minutes. Turn off the heat and ready to serve.

Serve with hot rice or sticky rice ( pulut) . Or may be you want to try something new… you are more than welcome to. 😀

Storing : This dish lasts up to a week and a half in the fridge. It can last longer if you keep it in a clean air tight container and freeze it, I would say a month. Just let it defrost in the fridge for a couple hours ( this you need to plan ahead of time) , pop up in the oven or microwave and heat up on stove.. whatever you prefer. Then it’s ready.. isn’t that easy peasy?  I hope so 😀

October 16, 2009

Healthy Kitchen Rendang Tok

Filed under: Allergy Free, Asians, Cooking, Gluten-Free, Malaysians, Side Dishes — nshahida @ 10:46 pm

Healthy Rendang

Don’t be mad at me if I tell you this rendang recipe is a new twist for health conscious people. Please have a first bite.. then tell me what you think. I have been thinking of making a healthy version rendang for a very long time, after I tasted one that my friend made back then in Minnesota, when I was in college. I was surprised, I mean really really surprised when she said she didn’t throw even a drop coconut milk and oil in her rendang. I could not tell the difference at all. The recipe? I didn’t get.. but she has inspired me a lot.

But why  took me years to try myself?  To get the rendang flavorful , spicy as the original authentic one yet keeping the saturated fat lower, quite tricky  to me. A few trial and errors helped me a lot to figure out the do’s and don’ts .

The trick here is kerisik ( coconut paste) that keep this rendang slightly creamy with coconutty flavor that you get from a normal rendang . I know kerisik still fatty , use it in moderation plus kerisik adds fiber to the rendang. 2-3 tablespoons would do the trick. Another must is shallots. Please see the head notes for details.

Of course, I will take other suggestions too.. feel free to share if you don’t mind.

For now, I can enjoy my rendang, , healthy kitchen rendang to be exact, with less guilty feeling without having to scarify the flavor. My husband loved it so much.. another bonus to me.

Rendang Tok(Chicken) -(Serves 5-6 people)

Shallot has very mild oniony flavor, slightly sweet and aromatic too. Mostly used in southeast Asian cookings .It’s a must for this recipe. So for the Kerisk.. please do not skip both for best result.You can find shallots in Asian grocery stores.. sometimes regular grocs market carry it, look at the fresh produce section. Slow cooking is very important to makesure the meat and the spices are incorporated well.

IMG_7233

Ingredients

  • 1/3 cup coconut paste (kerisik) ( See Notes)
  • 2 lbs ( approximately 1 kg) beef tenderloin, trim the fat and sliced ½ inch thick
  • 3 – 4 Tablespoons java brown sugar / palm sugar
  • 2 Asam gelugor
  • 5 kefir leaves or lime leaves (daun limau purut), torn
  • 2 tumeric leaves ( if available)
  • 1 stalk lemon grass, pounded
  • 2 Tablespoons match stick sliced fresh ginger
  • Salt to taste

Into a blender:

  • 15 dried red chili , soaked in hot water and drained or 2-3 Tablespoons chili paste
  • 8 shallots or 2 medium purple onion
  • 3 Tablespoons diced fresh ginger root
  • 4 stalks lemongrass
  • 2 Tablespoons sliced galangal
  • 2 fresh tumeric or 1 ½ teaspoon tumeric powder
  • 3 candlenuts ( buah keras) [optional]
  • 1 teaspoon coriander seeds }
  • 1 teaspoon fennel seeds }                            ground in a mortar
  • 1/2 teaspoon cumin seeds}                             until fine
  • 1/2 Tablespoon black pepper seeds}
  • 2 star anise}
  • 3 cloves }

-Blend thoroughly to form a smooth paste.

Methods:

1. Pour  the beef chunks, the paste and enough water to cover the beef into a large wok. Let them cooked slowly on low heat until the meat gets tender but still firm, about an hour.

2. When the meat becomes tender at this point, the gravy starts to thicken,  toss in the remaining of the ingredients; brown sugar/palm sugar, salt , coconut paste (kerisik), kefir leaves (daun limau purut) , sliced ginger root and asam gelugur. Adjust sugar and salt to taste. Let them continue to slowly cook on low heat.

8. Keep stirring , every 2-3 minutes to avoid burning on the bottom.

9. Continue stirring until almost all liquid is vaporized ,meat and spices are well blended. Rendang will look dark brown and pasty when it’s done. If you like your rendang slightly saucy , stop at the point you like your rendang . Most importantly, the meat is tender and the spice is well cooked.

10. Ready to serve with rice, pulut kuning (steamed glutinous rice)etc .

September 16, 2009

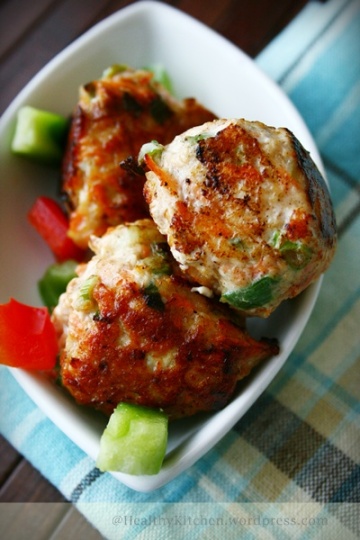
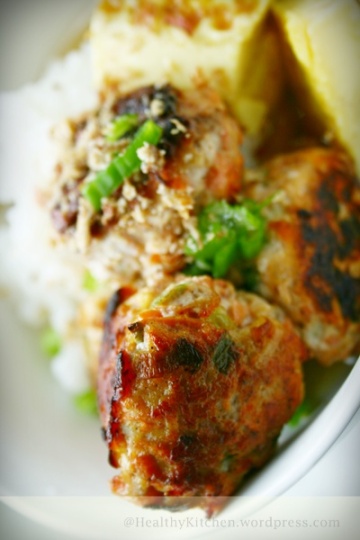
Asian Chicken Meat Balls

Filed under: Allergy Free, Asians, Cooking, Gluten-Free, Malaysians, Savories, Side Dishes, Snacks — nshahida @ 10:58 pm

Meat Balls

This is definitely my comfort food, one of the kinds. I love this chicken meat ball recipe, very Asian-y and of course healthy. This recipe was created in order to fulfill  my crave toward a good chicken ball, the one that suits my taste buds and diet. I didn’t want to throw this and that and end up with unpleasant flavorless chicken balls. So there I went, scanning my kitchen pantry and some pondering I did . I knew I wanted to go differently this time – ginger and cardamom were in my head. Grated carrot as the add in to boost up my fiber intake, since I love veggies…why not!

The ending was a surprise in delightfulness to me,  at least.. with punch of bright gingery flavor and hints of  cardamom, the meat itself so moist, flavorful and light , absolutely what I after for, perfecto Alhamdulillah!. This is a keeper. A plus, this recipe is kids friendly, too, cause you can hide the vegetables in the meat while they enjoying it without noticing. My 18 month toddler loves it.

How do we serve it? Enjoy it as snack, or to go with salad or along with pasta or rice.  Oh..I have an idea.. how about sandwich it! What do you think?

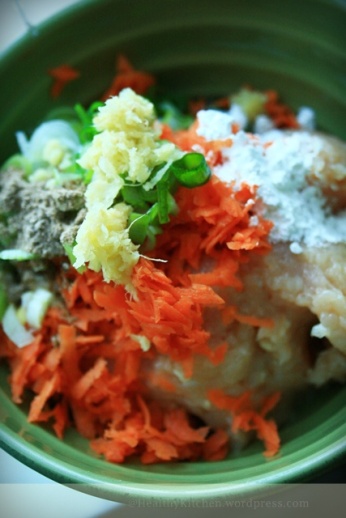
The Ingredients

Asian Chicken Meat Balls ( Makes 8-12 medium size balls)

It really is the ginger that makes this recipe an Asian flare but If you do not like ginger and cardamom at all, create you own by omitting or replacing  any of your favorite spices or herbs  such as cinnamon, chopped parsley , oregano and the like. The key is be moderate in adding spices or herbs so it will not be overpowering.

Ingredients:

  • 1 lbs (about 2 Cups) minced chicken breast, if the meat is too wet, squeeze the juice slightly
  • ¾ cup grated carrots , the juice slightly squeezed ( about ¼ cup juice is obtained, set aside for other use.)
  • 1 teaspoon grated fresh ginger
  • 2-3 Tablespoons finely chopped scallions or green onion
  • 1 Tablespoon finely chopped cilantro (optional)
  • ½ teaspoon cardamom powder
  • 1 teaspoon white pepper powder ( add more for more heat)
  • 1/2 teaspoon salt
  • 2 Tablespoons cornstarch ( or all purpose flour)

Methods:

1- Toss everything together in a medium mixing bowl. Lightly mix them to well combined. Scoop out a tablespoon of the mixture, form into a ball to makesure the mixture is easy to handle, if it crumbles.. add 1 teaspoon of the carrot juice or if it’s too wet and fall apart.. add 1 teaspoon cornstarch at a time until the mixture is easy to form. Cover the bowl and let it sit in the refrigerator for at least 30 minutes.

2- Scoop out 1 tablespoon of the meat mixture. Lightly roll it into a ball. ( be careful not to squeeze it or pack it up too much otherwise the chicken ball will lose it’s moist and tough in texture.. really.. we do not want that.) Place it on a big plate or baking sheet. Repeat the same thing with the remaining. You will finally get 8-12 balls depending on size actually.

3- Heat a medium pan or cast iron. Drizzle with 1 Tablespoon canola oil ( do this each batch). Let the oil heated.

4- Place 3-4 balls each batch on the heated pan. ( Do not overcrowd the pan if you want them seared well and not overcooked.) Let them cooked for 4-5 minutes , no more than that. Turn them over , and let cook on the other side for another 3-4 minutes. Remove from the heat and repeat step 3 with the remaining batch.

5- Serve while it still warm.

 I served my chicken meat balls along with rice porridge

I served my chicken meat balls along with rice porridge

Storing: If you have some leftovers, place them in a dry and clean Ziploc bag or container and sit up to a week in the refrigerator or 2-3 weeks (approximately) in the freezer.

Notes:

1- Why we do not want to over cook them? To keep the meat tender , moist , sweet and flavorful.

2- If somehow you happen to notice your meat is undercooked, place it back on the pan, let cook for 1-2 minutes.

July 30, 2009

Roti Canai (Malaysian Paratha)

Filed under: Asians, Breads, Breakfasts, Cooking, Malaysians, Savories, Side Dishes, Snacks — nshahida @ 12:42 am

IMG_6396

I have never imagined myself making Roti Canai on my own. Thought roti canai is the most difficult thing to make.Grew up watching my aunt; from kneading to stretching this roti I knew I would fail this mission if I were to make one.

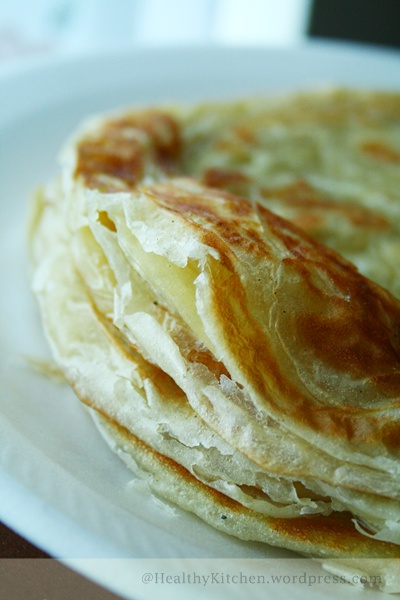
I wasn’t wrong at all. The first time, the 2nd also… is very predictable what would the outcome be… the bad one always goes to the chicken, you know it. Would I say Roti Canai is very tricky to make? Yes it is to me. But is it impossible? No, it is not. Because finally I made it, so can you.

To get the dough consistency correctly is what makes it adventurous,  I had to ask around including my mother-in-law(MIL) who makes  very good roti canai. With some of her tips I benefited, I should thank her. Oh yes, I did!!

Stretching roti canai.. It scared me big time. Safe to say, even more challenging, but not after several practices! Just like the one professional pizza makers do – they stretch and throw, almost exactly. I still remember, I learnt stretching and throwing my wet kitchen towel and got caught by hubby, he wondered what I was trying to do, some workout routine? Aha… may be!!  Well, it can also be done by stretching out the dough on a big plate till the dough gets really thin, according to my MIL. I think it’s a genius idea too!

The best part is when it just cooked – warm, flaky and soft. Serve it with Dhall Curry with dollop of Sambal (chili sauce)… or dip in anything… try with a little bit condensed milk, trust me… you couldn’t get any hyper-ly happier.

Now, isn’t it piece of cake!! You think?
IMG_6407

Roti Canai (Makes 8-9 medium size roti)

4 ½ cups all purpose flour ( Extra 1-2 teaspoons if needed)

1 tsp fine salt

1 cup water ( 250 mL)

1 large egg , room temperature

¼ cup condensed milk

1 Tablespoon melted butter

Enough canola or other cooking oil and butter for submerging/soaking / coating and stretching .

Methods:

1- In a large mixing bowl, mix all purpose flour with salt. Make a well in the center.

2- In a small bowl, stir together water, egg, condensed milk and melted butter until mixed.

3- Gradually pour in the mixture from small bowl ( wet mixture) into the prepared well in the large mixing bowl.

4- Using fingers to work the flour into the liquid until we can form a ball. Knead the dough until it is very smooth but we might notice the dough is a little sticky. Do not add flour just yet.. Keep kneading for about 10 minutes in total.

5- Cover the dough with kitchen towel and let it rest for 15 minutes.

( Note: This process helps the dough absorb the liquid evenly and to relax the gluten ever so slightly.)

6- Continue to knead the dough for another 8-10 minutes until elastic and feels like satin. Now, at this point.. we will notice that dough will be no longer sticky. BUT if it still is.. please add only one teaspoon. Continue kneading. Cover and let is rest once again for another 15 minutes. ( Kneading resting process helps minimizing development of the gluten and makes stretching and shaping the roti way easier without over tearing it.)

7- Knead the dough , this is to assure that all ingredients are evenly absorbed. At this point, we should be able to get a very elastic and smooth dough.

8- Divide the dough into half. Divide each half into 5-6, repeat with the other half, we will get 10-12 portion total. Form each portion into a ball.
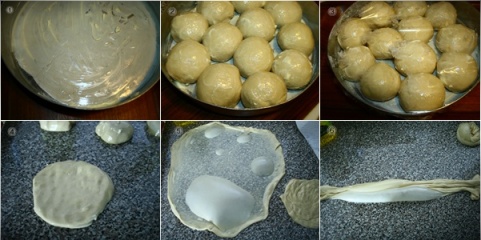
Roti Canai How to's

9- Now, it’s an optional whether to coat the balls with butter or oil.

If we choose butter, grease the bottom of a large pan with generous amount of soften butter so the balls won’t stick. Then generously coat each ball with butter, please make sure that each of them are well coated otherwise they stick to each other.

If we choose submerge them in large amount of oil, simple!! Pour small amount of oil into a medium bowl.. enough to coat the bottom of the bowl. Add the balls , all of them.. yes, lay them stack on each other.. don’t worry, they won’t stick cause you will add more oil into the bowl enough to cover the top of the balls.

To my personal opinion, submerging into cooking oil is much easier to work  with , plus if coating with butter.. still we will need some amount of oil while working on the dough later.

10- Cover the bowl/pan with plastic wrap. Let them rest in the refrigerator for more than 4 hours. Preferably overnight, 12 hours.

11- We are ready for the adventure ; shaping, stretching and frying. Before that, remove the bowl/pan from the refrigerator, let them sit at room temperature for at least 30 minutes. Just so the dough will be easy to work on.

12- Working on the dough, we need a large working space – about 35 inch  or bigger table , counter top etc. With palm, press each balls to make 5 inch diameter disk, one at a time. Let them rest for another 5 – 8 minutes. ( yes, a lot of resting require to minize the gluten from developing.)

13- This time we will have to play with oil.. lotsa oil.. Oil the working surface/board .. including our hands.. oil them generously. Oil prevents friction between our hands and the dough and between the dough and the working surface. Oil also keeps the dough moist. This is very important method to be followed otherwise we will have difficulty to stretch the dough really thin and the dough will stick and messy and tearing everywhere.

14- Start with the first pressed dough, lay the dough on oiled working surface.Brush the dough with oil  or oil plus melted butter. Lightly press in middle of the dough with fingers, from the center.. start pulling and stretching the dough evenly. Be careful not to tear it esp in the middle because the tear will grow bigger as your stretch and you really need to start over. Just lightly press it until we get about 8-9 inches disk. If by chance the dough spring back when stretching, let it rest for 5 minutes and then come back.

15- If the dough gets dry, brush more oil. Then work at the edges, with the heel of palm, press the edges .. stretching the dough evenly so as not to tear it and working all around the dough in a circle.

16- Oil our hands and the dough again. Take the dough from one edge with one hand. Slam the dough quickly and working all around in circle the same way. This is what we call ‘kebar/tebar’ or stretching roti canai. Repeat until the dough gets really thin and translucent. There will be tears and holes at the edges, do not worry, they will be covered by the many layers on untorn part.

If this method is found tricky .. yes it is for the beginner. Here is another method we can try.

On oiled big plate, lay the dough in the middle. Stretch  dough (See step 14 and 15) until we get to edges of the plate. Keep oiling the dough if it start to dry out. Stretch and pull into thinner sheet.

17- Bring one side of the thin dough to center. The other side to center to form a long dough. . If we can get air trapped in the thin sheet at this point, don’t press air out as it would give a lighter fluffier result.

Roti Canai How to's 1

18. Hold one end upwards and the other end on the working surface. Swirl it down to form a  piece of  swirly turban . Let it rest for about 15 minutes, the longer the better ( reason? Because later we will  pat it to make a larger and thinner turban, so we need to rest the gluten again to make it easy to shape it.)

Repeat step no.13 – 18 with the rest of the balls.

19- Pat the turban dough with tips of our fingers. If needed,Only slightly stretching required. Pat until 10-12 inches disk is formed. Preheat  a medium pan on medium heat, pan fry/cook the roti . Flip on the other side when it start to bubble , slightly brown and crisp. Keep flipping until cooked. Repeat with the remaining.

20- Serve it warm with Dhall Curry with dollop of sambal or anything to your liking.
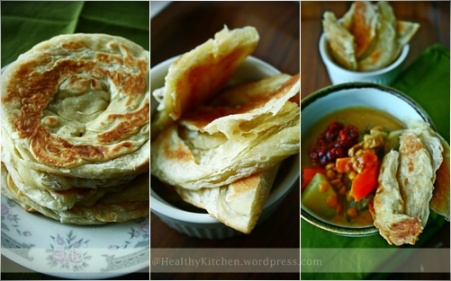
Roti Canai

Troubleshooting and Notes to success :

1- Whole wheat flour is not recommended for this recipe.

2- This is important to get a very elastic dough before resting it, too soft dough may cause lots of holes and tears on the thin dough. The right consistency of the dough is very crucial in making roti canai.

3-  I know, this roti canai method requires several of resting process but I can vouch you, iA.. the end result that make you thank yourself. It worth the waiting. Flaky, light and pliable soft roti canai is what we aim for.

4- Work the dough very quickly to avoid the dough from drying and tearing.

5- Brushing the dough with oil and butter makes our roti canai flakier and layery . Either way works just fine.

6- Do not overcook the roti canai cause it will get too flaky, dry out and crumbly.

Storing:

If cooked fully, store them in a clean and dry Ziploc, refrigerate for up to 2 weeks. If planned for longer storing, cooked the roti just until bubbled and slightly crisp , lay each half cooked roti canai on a parchment paper, stack on each other. Place in a Ziploc /freezer bag, double it. Freeze for up to 4 months.
July 15, 2009

Aromatic Sweet Sour Beef – Malaysian-Thai Style

Filed under: Asians, Cooking, Gluten-Free, Malaysians, Savories, Side Dishes — nshahida @ 12:06 am

Dark Sweet Sour Beef

We consume meat 3 times per month, sometimes less. When we plan a menu for beef,  we’d love to savor it with something decent.. Something reminds us of home, something Malaysian are always the best.

One of the varieties I usually make is this aromatic sweet sour beef that has hint of Thai flavor in it ; Kefir leaves , lemon grass and a must – Tamarind . Serve it with just hot plain rice and along with some steamed veggies, definitely my favorite of all time – very comforting. Alhamdulillah.

Enjoy!!

Sweet Sour Beef (Serves 4 people)

The Ingredients:

  • 1 lbs beef tenderloin ( thinly sliced, about ¼ inch thick)
  • Salt and tumeric , for seasoning.
  • 11/2  Tablespoon cooking oil

1- Wash the beef slices, pat dry with paper towel. Seasoned with salt and tumeric, let it sit for 15 minutes.

Usually, people stir fry this marinated beef with some amount of oil until it gets browned, tender and slightly crisp at the edges. But here is what I do to save my cooking oil and healthier, it works just fine:

2- Heat the oven to 400F/205 degree Celsius . Drizzle 2 tablespoons canola oil on a baking pan/tray. Arrange each piece of meat on the tray on single layer. Bake it till brown and crisp , about 20-25 minutes. Make sure not to overbaked them because the meat will get too crispy, dry and lack of flavor.

3- Remove from the oven, cover with aluminum foil until ready to use.

For the spicy paste:

  • 8 large shallots or 2 large yellow onions (preferably shallot)
  • 3 cloves garlic
  • 1 inch fresh ginger, sliced
  • 3 Tablespoons chili paste, reduced for less spicy , depends on how spicy you desire
  • 1 lemon grass, sliced chunk.

everything in a blender, blend to form a smooth paste consistency. Set aside.

Other Ingredients:

  • 3 Tablespoons tamarind pulps, Mix in ½ cup of warm water, squeeze with fork or tips of fingers till concentrate of tamarind juice is obtained. Remove the seeds.
  • 1 lemon grass, the root is pounded.
  • 1 large yellow or purple onion, slice into rings.
  • 3-4 fresh kefir leaves
  • 2 Tablespoons soy sauce
  • 1 Tablespoon chili sauce, optional, this makes the sauce thicker and glossy.
  • Salt and Sugar, to taste
  • 2 -3 Tablespoons cooking oil (canola, corn , vegetable oil , etc)

Methods:

1- On medium high heat, in a medium wok or sauce pan, heat the oil until hot.

2- Add in the spicy paste, stir in pounded lemon grass. Let them browned and fragrant.

3- Add in tamarind juice, soy sauce, salt and sugar. Stir them together till well incorporated. Let them bubble till the oil separated and floating on top. Adjust the salt and sugar to suit taste buds.

4- Reduce the heat to medium low, toss in the cooked/baked beef, kefir leaves and purple or yellow onion rings. If the sauce is too thick, add ¼ cup water. Let them bubble again, for about 3 minutes. Add the chili sauce, if using, stirring to well combined. Remove from the heat. It’s ready.

Older Posts »

Create a free website or blog at WordPress.com.