Healthy Kitchen Smells Fresh

July 11, 2009

Pau or Steamed Buns with Bean Filling

Filed under: Asians, Breads, Breakfasts, Chinese, Desserts, Malaysians, Savories, Side Dishes, Snacks, Vegetarian — nshahida @ 8:41 pm

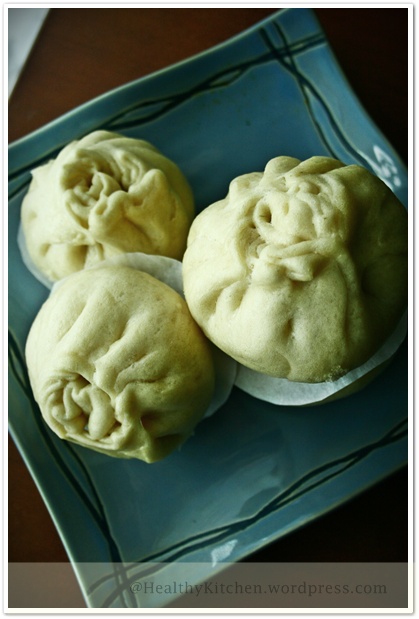
Pau

It’s been while I didn’t make this ..long enough to get me drool over a Chinese bun – what’s so called steamed bun or we Malaysians call Pau. I really enjoy this very moist but still chewy gummy ( in a good way) bun with balance of sweet salty creamy or sometimes savory filling.. really.. the filling is of your choice. I prefer bean filling that is not overly sweet, personally! also can be store bought or homemade. I adore the homemade one.

Making these Chinese steamed bun isn’t tricky at all  if you do a lot bread baking or not.. I agree, the recipe might be a little different.. it really depends on how you want it. I mean, the type of flour calls for the recipes is varied. For instance, if you are like me, be it slightlychewy , fluffy and soft at the same time, regular all purpose flour is all you need. For more on fluffier cakey like, you might want to grab some sort of low gluten flour – cake or superfine flour. It’s all up to your preferences.
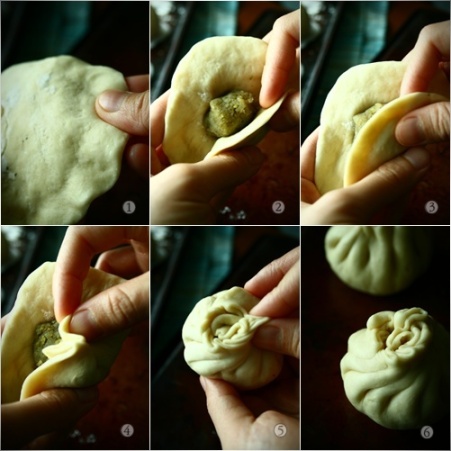
Pleating

For pleating, again, is up to your own creativity. I love making it the way Chinese make their steamed bun or the like. There is art of making it. Just like karipap , takes some times to master the skill that you will finally proud of yourself. Or, another choice, make it snappy simple! Wrap the filling up, roll it then in one second you are ready for steaming.. can’t get any easier. It still ends you with a good result anyway .Especially when it just comes out from the steamer – adorable fresh looking and warm soft fluffy bun with the filling on each bite. Can’t get over it !
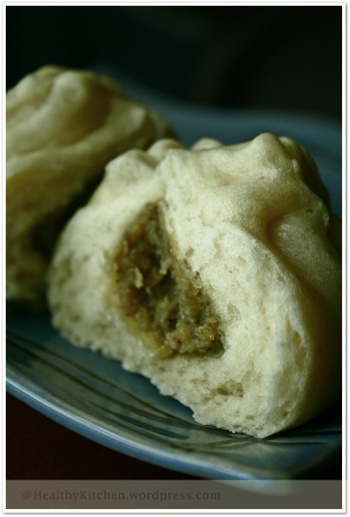
IMG_6016

For the recipe, I adapted from few collection of Chinese/Asian cook books and some online recipes. Came up with the combination of all and that’s what I’ve been using so far ; with the result I after for.
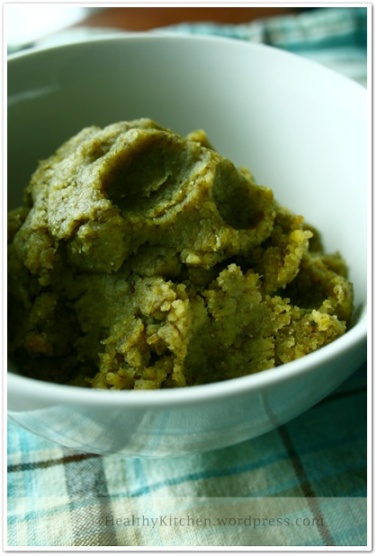
Bean Paste

Bean Filling Paste. ( Makes 2 Cups)

Ingredients:

  • 2 cups Dried green beans

(Soaked in water overnight, 8-12 hours. Cook till tender , drain to separate all the excess liquid and set aside)

  • 2 Tablespoons light brown sugar
  • 1 Tablespoon white sugar
  • Salt, to taste
  • 3 Tablespoons canola oil

Methods:

1- On medium heat, In a medium sauce pan, add in the cooked drained green beans. Stir in light brown sugar, white sugar and salt. Let them cooked together and the sugar caramelized. Adjust the salt as needed.

2- Drizzle in canola oil, toss them to well incorporated. Turn off the heat.

3- Now it’s up to you, you may want to mash this bean mixture with potato masher. Mash until you get smooth mushy paste. Or another easier option, my personal favorite, put the mixture in the food processor, process till smooth consistency paste – not too crumbly or runny. DO NOT add any liquid to the mixture, if needed, pour in 1 tablespoon canola oil if the mixture is very crumbly and too pasty.

Ready to use or STORE in a clean dry container in the refrigerator up to 1 ½ week or freeze it for up to 3-4 month.

Steamed Bun ( Pau) (Makes 12-14 buns)

Ingredients:

  • 4 ¼ cups all purpose flour, 2-3 Tablespoons extra as needed
  • 1 Tablespoon Baking Powder
  • 1 ½ teaspoons Instant Dry yeast
  • 3 Tablespoons canola oil
  • 1 Tablespoon honey (or white sugar)
  • 250 mL ice cold water , 2 teaspoons extra as needed
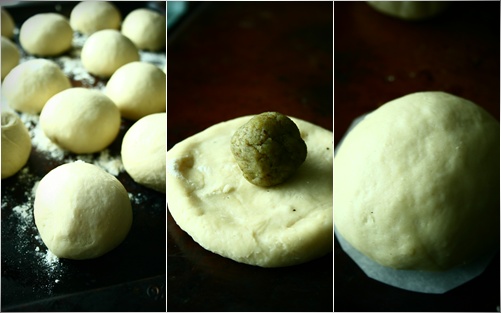
The Simple Easy Method For Wrapping The filling

The Simple Easy Method For Wrapping The filling

Methods:

1- In a large mixing bowl, mix well all purpose flour and baking powder. Then add in dry yeast.

2- Stir in honey or sugar, canola oil and pour in ½ cup of water. Mix everything together. Then add another ½ cup of water, mix until smooth and soft dough is formed, about 4 minutes.

3- Cover the bowl and let it sit for 15 minutes.

4- On lightly floured surface, knead the rested dough till soft and elastic dough is formed, about 8 minutes. ( if by chance, your dough is still sticky, add 1 teaspoon of flour , knead and add bit by bit of flour, keep kneading until the dough becomes smooth soft and elastic. Add 1 teaspoon of water if otherwise.)

I repeat Steps 3 and 4 one more time , just to assure all ingredients are well combined and the dough are really silky smooth.

5- Divided the dough into 12-14, roll into balls.

6- Spray a large baking pan or any large container to fit the balls. Sprinkle with a little bit of flour. Place the balls on the flour pan. Space each ball about 2 inches apart so that they won’t stick to each other as they rise. Cover with large plastic bags or wrap with plastic wrapper. Let them rest in the refrigerator for 8-12 hours. (or the balls can stay in the refrigerator for up to 2-3 days, if not using after that, wrap them individually with plastic wrapper , place in a Ziploc/freezer bag and keep in the freezer for up to one month).

7- Take the balls out of refrigerator, 30-45 minutes in advance before working on it again. Let them sit at room temperature just so they rise almost double in volume.

If you choose the simple way, here is the method:

1- Roll up flat one ball at a time, spoon the filling (of your choice) , about 1 teaspoon in the middle of the dough. Wrap up the filling by stretching out the edges of the dough. Cover it tightly so that it’s wont ooze out while steaming. Repeat with the remaining.

2- Cover them with damp kitchen towel, or large plastic bag. Let them rest again, the last one for about 15-20 minutes, they rise again at this point. DO NOT let them rise too much, your steamed bun will fall while steaming and the skin wrinkle.. that’s not pretty, though won’t effect the taste.

3- While waiting them rise, heat the steamer on medium-high heat , makesure the steamer is hot, I mean really2 hot. Line the steamer pan with parchment paper or banana leave so the buns won’t stick to the pan.

4- Arrange the buns on the steamer pan, 3-4 dough balls at a time, depending on the size of your steamer. Make sure to space each ball, 2 inches apart just so they don’t stick to each other. Steam for about 20 minutes. Remove from the steamer and enjoy.
June 11, 2009

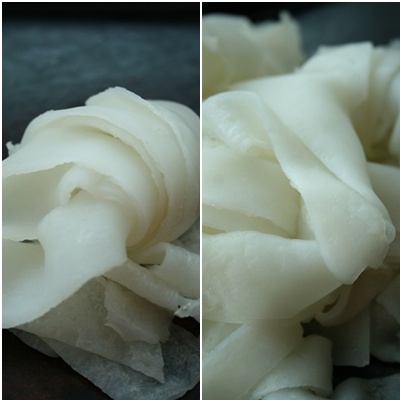
Homemade Koew Teow ( Flat Rice Noodles)

Filed under: Allergy Free, Asians, Chinese, Cooking, Gluten-Free, Malaysians, Noodles, Vegan, Vegetarian — nshahida @ 10:39 pm

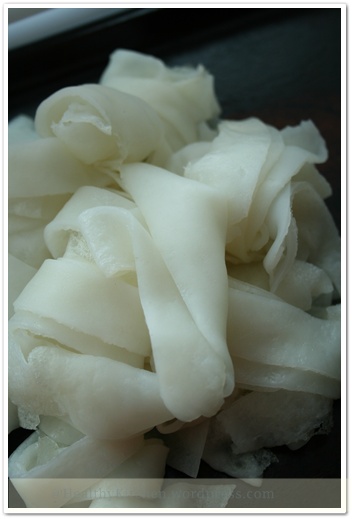
Koew Teow

After quite number of times trying to make homemade rice flat noodles or koew teow , which were disastrous , I had never tried to make it again ever since. Thought it was easy to make, unfortunately I was wrong.. err.. may be it just me.

I don’t remember what happened until I was convinced to make it again. Perhaps, it popped up in my head when I was thinking about making an allergy free version of noodles. With my mother’s big help, I finally got full bowl of rice noodles of my own. Still after a couple unsuccessful attempts, but I guess all the efforts is paid off and I am so thankful.

With compliments my husband awarded me for this homemade koew teow, I feel confident and happy to share this with you.

Different people make this noodle differently, so do I. I find the version I am about to share with you works best for me, I hope it does for you too. This recipe does not call for all purpose flour or any source of wheat or gluten so for those who has problem with gluten , this is for you. Especially for my sister, Kak J who makes a lot of AF foods for her son.

Warning : this noodle recipe is not suitable for those who is allergic to rice , corn or potato.

Flat Rice Noodles. (makes 12-14 crepes , 4-5 servings of noodles )

TIPS:The first round making this ‘crepes’ may be gone to the chicken for some of you, the same thing happened to me so don’t get discouraged! Keep trying until you get it. You will finally figure out how it works.

It is highly recommended to use non-stick pan.. any kind otherwise you only get dumpling instead of flat noodles. Different size of pan will need different amount of batter mixture each time cooking the ‘crepes’ , play around with the amount until you get it.

If making rice spring roll wrapper, reduce the amount of batter to pour on the hot pan, this make thinner crepes .

Ingredients

  • 1 cup rice flour
  • 1 cup cornstarch
  • 1/2 cup tapioca flour (see Note)
  • 1/4 teaspoon salt
  • 6 cups Luke warm water
  • ¼ cup canola oil or vegetable oil and some extra for brushing.

Methods:

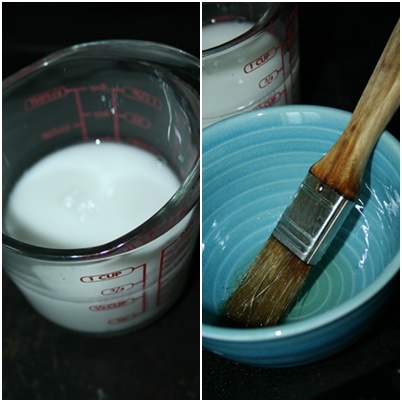
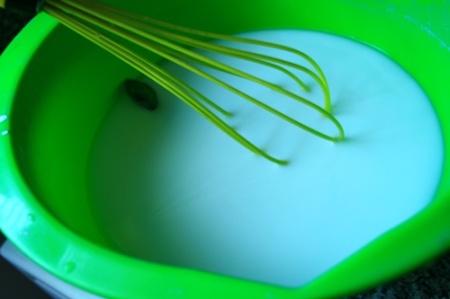
  1. In a large mixing bowl, whisk the rice flour, cornstarch, tapioca starch/flour and salt.IMG_3959
  2. Stir in the water and canola oil , whisk to well-combined. Set aside to allow the batter to sit and absorb liquid at room temperature for 20 minutes.Measures and brushing
  3. Heat an 8-inch nonstick skillet and brush with oil. Whisk the rice-flour batter well each time before pouring on the hot pan.

    IMG_3967

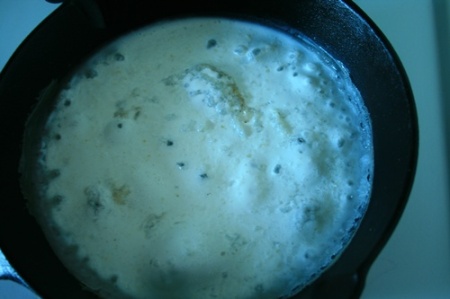
    When you see the batter starts bubbling, it means you are good.

  4. When the oil is hot, pour 1/3 cup of the batter into the skillet, tilting and shaking the pan slowly to evenly coat the pan with batter.

    Cover with lit

    Cover with lit

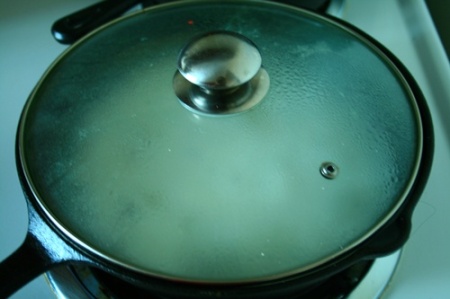
  5. Cover and cook over medium-low heat until the ‘crêpe’ is firm, about 3-4 minutes. Let it continue to cook for about 2 minutes. With a spatula, slowly remove the cooked batter from the pan to avoid the crepe from tearing.Methods
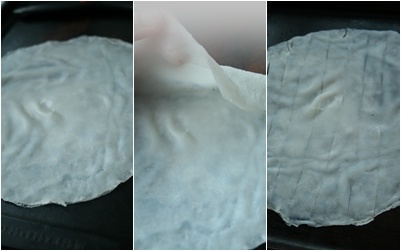
  6. Flip the crêpe out flat onto a prepared baking sheet. Repeat with the remaining batter , it make approximately 12-14 crepes in total; don’t let the crêpes overlap on the baking sheets or they will stick together. Let them cooled and completely firm to touch.
  7. Take one crepe , score it into 8-10 pieces of flat noodles, depending size of preferences. Continue with the remainings and ready to use. ( you may want to roll the crepe up before cutting into noodles size but be careful because it may stick, make sure the crepes are completely firm and cooled).

Koew Teow

Storing: If making a head, place the noodles in a clean and dry freezer/Ziploc bag, refrigerate  up to 5 days, freeze up to 4 weeks

December 4, 2008

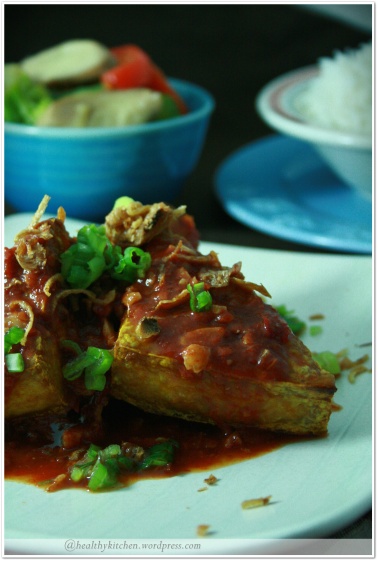
Baked tofu with spicy hot Asian sauce

Filed under: Asians, Chinese, Cooking, Gluten-Free, Malaysians, Vegan, Vegetarian — nshahida @ 2:05 pm

img_0644

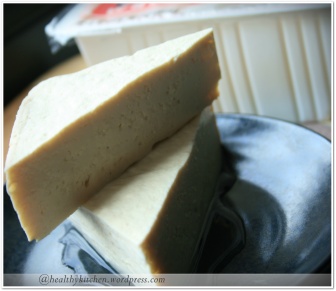
Tofu is also called bean curd in English is Chinese origin. Made by coagulated soy milk and required pressing to get to the final result, firm and velvety silky texture.

If you are looking for a non cholesterol unsaturatedly low fat food that is rich in protein, iron and may be calcium.. tofu is one of the best choice to be in your menu. It can be definitely found in Asian Supermarket and almost everywhere nowadays I figure. It can actually sold in variety way – firm , medium, soft , silken tofu and even dried tofu. Isn’t that amazing?

Recently, Tofu is widely used by vegan in place for meat and as an egg replacer in baking. You can now make almost anything with it; cooking, marinate, stir fry, grill and not to mention, baking. It may be sound yucky and it did when I was a kid , not anymore.. surprisingly. In my household, tofu is must-to-be in our everyday menu, ok I am exaggerating! At least 2 -3 times per week. Let’s say, it’s all time favorite for Asian household.. probably.

img_0591

img_0600

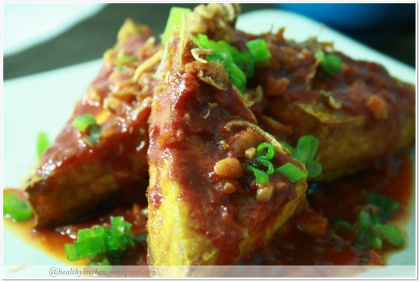
Baked tofu with spicy hot Asian sauce is one of the keepers to my family. Normally in Malaysia, this type of dish usually prepared with deep-fried boiled eggs. Since I am not a huge fan of egg or whenever I have the feeling of an overdosed with cholesterol, tofu is absolutely the best option.. no.. I am no vegan! As mentioned above, I myself am shocked that I am finally heart tofu.. how’s that happened? I totally am uncertain.

In south east Asia, this tofu dish isn’t a strange thing  to be savored with hot rice and stir fried veggies . As for myself, I like it really hot and spicy with a hint of sweet and sour flavor comes along.Very satisfying! Even my personal food tester (husband) who thought this was the weirdest food ever began to love this dish.

So here I am , sharing my version of Sambal Tofu or Baked Tofu with hot sauce.

If you do like tofu dish.. you are more than welcomed to try it , if egg version is what you prefer.. here is the wonderful recipe from a favorite blog that is worth try.

Baked tofu with spicy hot Asian sauce

Ingredients:

4 blocks of firm tofu ( diagonally cut each block to get 2 triangle tofu, achieve 8 total)

Pinch of salt

2 teaspoons tumeric powder

1 Tablespoon canola oil

In a blender:

2 Shallots

2-3 cloves garlic

15-20 dried red chili , soaked in hot water for 20 minutes and drained. ( add more if you prefer it extra hot)

Or 4- 6 Tablespoons of chili paste.

2-3 Tablespoons water

– blend thoroughly until well blended and smooth

Other ingredients:

1 Tablespoon tomato ketchup

1 teaspoon white vinegar or lime juice

1 Tablespoon or more honey or sugar

Salt to taste

3-4 Tablespoons roasted peanuts, chopped

Water if needed

11/2 Tablespoons canola oil

Garnishing:

1 Stalk green onion , thinly chopped

1 Tablespoon fried shallots ( more to your preferences)

Methods:

Preparing the tofu: Rub salt and tumeric powder on the cut tofu. Line a baking sheet with aluminum foil, brush the oil on a prepared sheet. Arrange the tofu on the sheet. Bake in 450 F until slightly crisp at the edges and golden brown. Set aside. ( See Notes)

Preparing the sauce:Place a medium sauce pan on medium high heat. Drizzle in cooking oil. Let the oil heated for 3 minutes.

Pour in the blended mixture and stir until well incorporated. Let it cooked until fragrant and slightly brownish red chili paste is formed. Add in ketchup , vinegar, sugar/honey, salt. ( See Notes)

Reduce the heat to medium low. Keep stirring until well combined. If the paste is too thick, add water bit by bit. Let it simmer until oil separates and appears on top. (See Notes).

Adjust salt and sugar to your taste. Add in the chopped roasted peanuts. Stir just a little bit. Let it simmer for 2 more minutes. Turn off the heat.

Serving :In a large plate or bowl,  pour the hot sauce over the baked tofu. Generously sprinkle the chopped green onion and fried shallots. Serve it with hot white rice and stir fry veggies or anything to your liking. Enjoy your dinner with the loved ones!

Notes for myself and probably for you:

  1. Normally, the tofu is deep fried but I choose to bake it for I don’t do much deep frying plus of course this one is the healthier version. I’d say. Trust me my friends, It doesn’t alter the flavor at all.. alhamdulillah.
  2. This is important to let the paste mixture completely cooked otherwise the sauce will end up too tangy and onion-y
  3. Since I don’t use too much oil, the oil will not appear that much and the sauce doesn’t look too greasy. It still tastes great to my taste buds.

November 13, 2008

Ayam Madu

Filed under: Asians, Chinese, Cooking, Gluten-Free, Malaysians — nshahida @ 10:49 pm

img_31131

Back in the saddle.. I wasn’t in a good feeling the past few days and that left my kitchen’s blog abandoned. Not my kitchen tough, it steams around the clock for we have to eat, everyday. Due to that condition, I only cooked as simple as I could plus I was extremely lazy.. I admit. Simple yet it has to be nutritious.

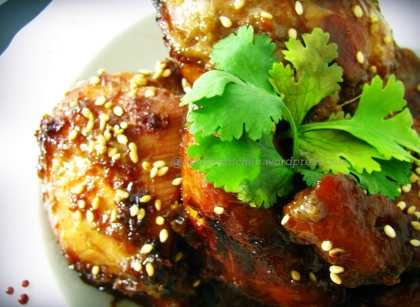
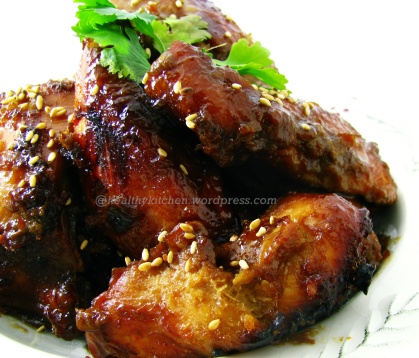
I made Ayam madu or Honey chicken which is usually served with chicken rice. The gingery and sesame-ny taste isn’t really overpowering.. just nice. The soy, oyster and honey really add the sweetness and flavor of  Asia. Honey acts as the glaze makes this chicken dish looks depressingly appetizing.

Though, I didn’t make chicken rice , only regular white rice. Alhamdulillah, still..to my taste buds, It was delicious along with hot rice and steamed veggies.

If you, my dear friends, who loves simple chicken dish and not feeling well as I was.. you might want to give it a shot and insyaAllah you will feel a lot better .

img_3112

Ayam Madu

Ingredients:

1 whole chicken – cut into 6 -8 pieces

A pinch of salt

In the blender

1 inch fresh ginger

3 shallots

2-3 cloves garlic

-Blend together till well blended

Other Ingredients

3 Tablespoons honey

3 Tablespoons oyster sauce

3 Tablespoons soy sauce

1-2 Tablespoon sesame oil

Methods:

In a large pot, add in the chicken pieces , pour in water enough to cover the chicken. Turn the heat medium high and cook the chicken to half cooked. Add pinch of salt at the end. Remove from heat and drain the cooked chicken and set aside.

In a medium bowl, whisk together honey, oyster sauce, soy sauce and sesame oil. Stir until well combined.

In a large bowl, add in chicken. Pour in the blended mixture and the sauces from the medium bowl. Stir everything together until completely combined . Makesure the sauce/marinate covers the meat.

Cover the bowl with plastic wrap and place it the refrigerator. Ready to marinate for at least 4 hours ; the longer the better.

After marinating ( 4 hours or so) , Turn the oven to 450F , arrange the chicken on a baking tray or oven griller, bake until the chicken look very glossy and of course, completely cooked. ( See Notes)

Sprinkle with sesame seeds (optional) . Serve it hot with rice and any kind of veggies.

Notes Of The Day:

1- Makesure the chicken is half cooked , Not thoroughly cooked otherwise you will miss the flavor and moistness of the chicken – which is very important.

2- You can use all chicken breast if you wish but the marinating period should be shortened too. Chicken breast is very tender and absorb flavor more easily. If it’s too long marinated, it will be too tender and fall apart after baking. Especially if marinated with acid.

3 – If using chicken breast, to keep the moistness of the meat, do not bake it too long as it will get ‘dehydrated’. Keep eye on it.

November 3, 2008

Risk It All – Rice Spring Roll

Filed under: Asians, Chinese, Cooking, Gluten-Free, Malaysians, Savories — nshahida @ 11:46 pm

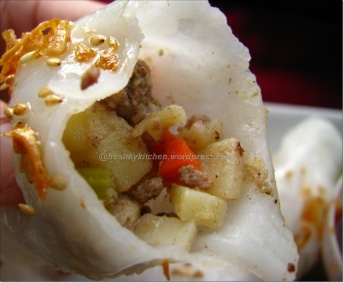
Karipap Filling

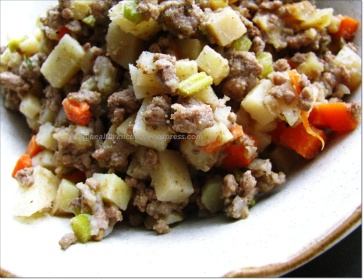
I still have a full container of karipap filling I made the other day. I wanted to finish it before it has to go straight to the garbage.. oh food to the garbage? it will never happen , insyaAllah.. but what am I going to make with it? I asked silently. Spiral karipap? samosa? steam bun? spring roll? I was too lazy for any of these but spring roll sounded great.

Off I went to my personal ‘lab’ and tried making rice spring roll. Rice spring roll? oh no!! one of food experiments that I have given up for years since my college years back in Minnesota. I made this sort of steamy -looking- Vietnamese Chinese style roll and has never turned out ‘edible’ . And now risking myself again? why not, right?

Alhamdulillah.. unexpectedly I made it! My food tester even liked it and wanted more. I somehow forgot to measure the amount exactly ( biting finger) . Thus, it would be a good reasoning to hopefully have fun making rice spring roll again.. insyaAllah. Next time, I want to try with different filling… may be the one I made while ago with my ‘sister’ in Minnesota. I love that one better!! 🙂

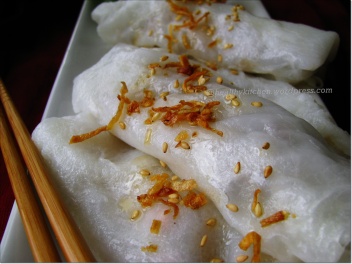
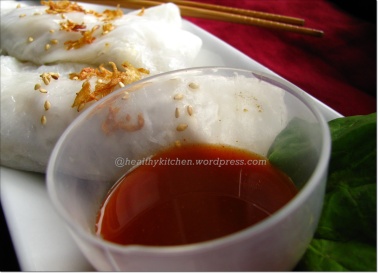
Garnished Rice Spring Rolls

Garnished Rice Spring Rolls

Sweet Sour Sauce for dipping/drizzling

Sweet Sour Sauce for dipping/drizzling

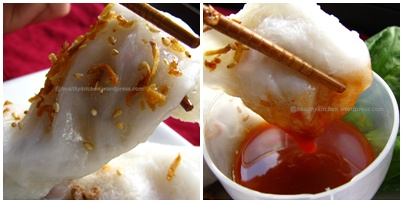
Eat it with chopstick or hand

Eat it with chopstick or hand

Inside and Out

Inside and Out

Let me summarize the recipe – this is an allergy free kinda roll except for those who cannot use rice. It contains rice flour, cornstarch ( can be replaced with potato starch) , tapioca starch and just water. InsyaAllah, I will post the recipe and probably step-by-step photos.

And as for the karipap filling.. alhamdulillah, half  more to go!

Older Posts »

Blog at WordPress.com.